Follow the steps below to set up the computer so that you can manage Office 365 mailboxes with PowerShell. The computer does not have to be ou.ad3.ucdavis.edu joined.
On every log in after, connect to Office 365 Exchange using the script and enter in your credentials:
- Connect
PowerShell does NOT have to be run as an admin
- Enter in your OU Admin credentials in the form of UPN and password

Initial Setup
- Download and Install Microsoft Online Services Sign-in Assistant for IT Professionals RTW from https://www.microsoft.com/en-us/download/details.aspx?id=28177
msoidcli_64.msi
- Visit http://kb.ucdavis.edu/?id=0322 and save the script
Office365Connect.ps1
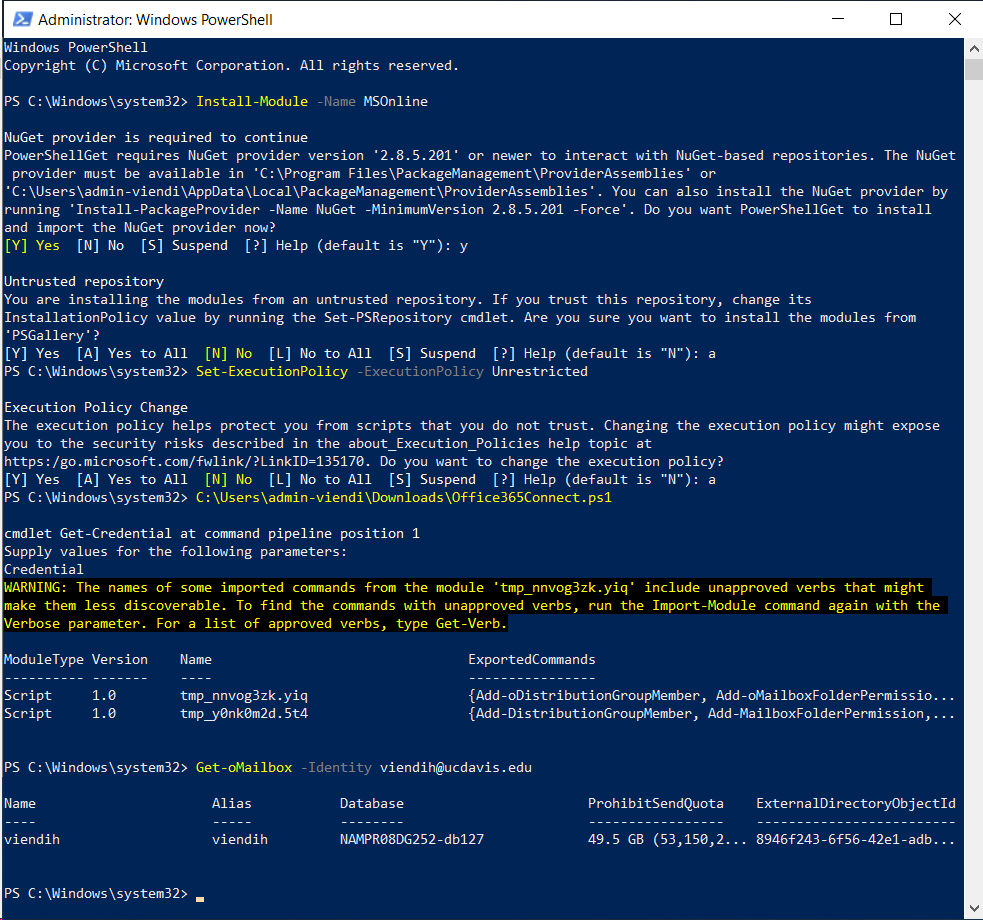
- Run PowerShell as an admin or else you cannot install modules
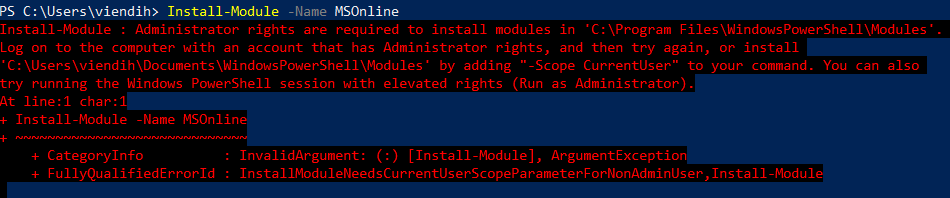
- Install Windows Azure Active Directory Module for Windows PowerShell
Install-Module -Name MSOnline
- If necessary, allow PowerShell to install and import the NuGet provider

- If necessary, trust the repository and install the modules

- Enable running scripts
Set-ExecutionPolicy -ExecutionPolicy Unrestricted
- Allow changes to the execution policy

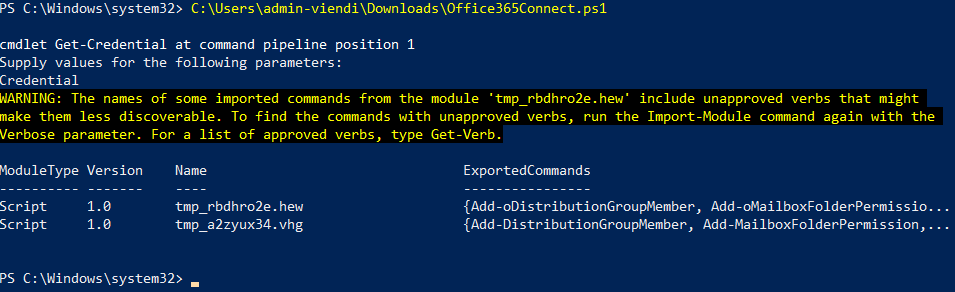
- Browse to the saved script from http://kb.ucdavis.edu/?id=0322 and run it
- Enter in your OU Admin credentials in the form of UPN and password
- Wait for it to finish.
- Test a command
Get-oMailbox -Identity viendih@ucdavis.edu

- Verbage for Office 365 mailboxes cmdlets
Source: http://kb.ucdavis.edu/?id=0322
All cmdlets use the format of Verb-Noun. The format for these cmdlets is essentially the same as they are for on-premise mailboxes, with one difference: you need to place the letter "o" in front of the noun part of each cmdlet. For example:- Get-Mailbox -Identity [UPN] will look for a mailbox on-premise.
- Get-oMailbox -Identity [UPN] will look for a mailbox in Office 365.
- Extra: If all goes well with the initial setup, it should look like:
0 Comments