Follow these steps to add a network printer to your computer on Windows.
Windows 11
- Right click on the "Start Menu" and Go to "Settings"
- On the left list, click on "Bluetooth & devices"
- On the middle list, click on "Printers & scanners"
- At the top, click on "Add device"
- If the printer you want to add is listed, select it, and add it to your computer
- If the printer you want to add is not listed, scroll to the bottom of the list. Next to "The printer that I want isn't listed", click "Add manually"
- Select the option, "Select a shared printer by name"
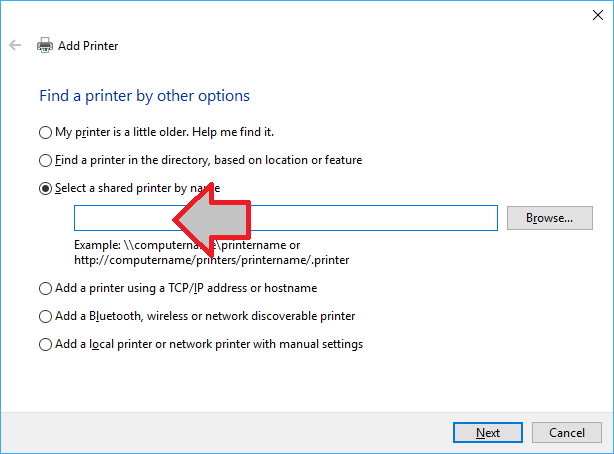
- Type in the print server and the printer name
Most of the time, it will be "\\wildwing.des.ucdavis.edu\printername" - Click "Next" if necessary
- Wait for the printer drivers to install
- Click "Next" once prompted
- Optional: set this new printer as your default printer by checking the box
- Click the "Finish" button
0 Comments